The power of waiting when adding more watercolour
Did you know that the amount of time you wait to add extra colour or water to your paintings can greatly affect the result you end up with? RIGHT?! Just when you thought there were enough things to juggle, the medium adds a ticking timer to your worries...
You may have run into some of these troubles before: Accidentally causing a water spill on your page. Creating an unsightly bloom. Waiting too long to add more paint and the whole layer is dry.
No need to stress though! By understanding what happens at each time interval, and how to spot the 'readiness' of the paper, we can get a handle on our techniques.
🚨 WEW-WEW! IMPORTANT NOTE ALERT 🚨
There are SO many variables when it comes to watercolour. If you want to grab a stopwatch and time how long it takes for your paper to produce each result below, go for it, who am I to stop you, the Art Police? But please don't rely on those exact timings going forward. It will only trip you up.
Changing your paper type or simply painting in a slightly different temperature or climate will throw those measurements out the window! Just like colour mixing, we can't rely on exact measurements and ratios, we need to do it by eye. Focus on observing how the paper LOOKS before you add to it, rather than keeping count of the seconds.
1. FLOODING (PAPER IS VERY WET)
If you add more water or colour to part of a painting that is extremely wet (if you looked at your paper from table-height, you should see blobs visibly raised off the page) it will flow fast, flood your page and can buckle your paper. Some people love to let colours run and flow, and hey - it can make cool backgrounds. Sometimes it's good to make the page very damp from the start for extra working time as well - but it's important to know what will happen when you add more paint or water to a very wet area.
If you didn't mean to flood it, all is not lost, soak up extra water with a dry / thirsty brush, or gently dab a corner of paper towel in the flooded area. To avoid it, wait until the paper only has a slight sheen to it before adding extra paint or water.
2. SOFT BLEND (THE "PERFECT" AMOUNT OF MOISTURE)
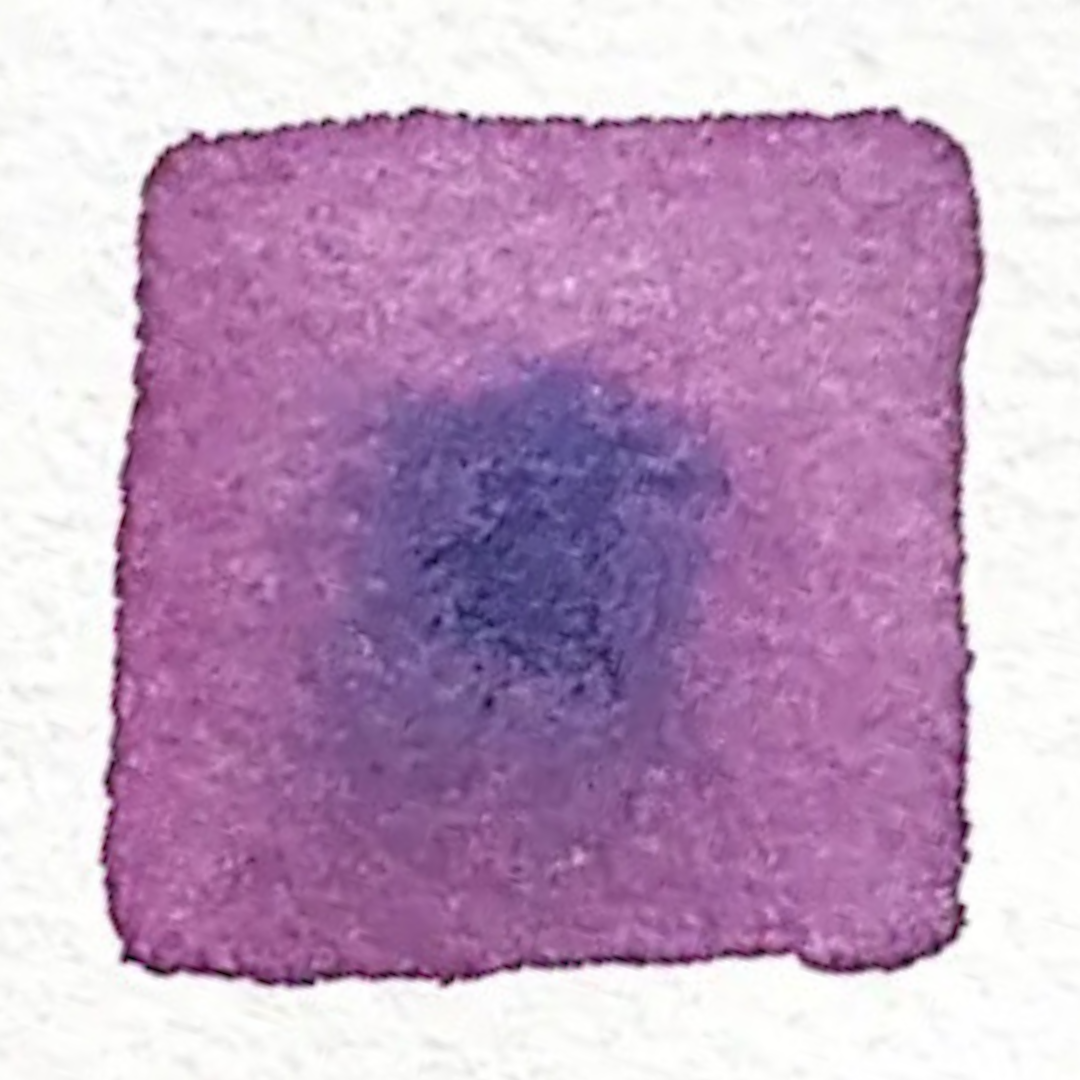
This is the result that a lot of us want, a lot of the time. Wet-in-wet or wet-on-wet. The layer is damp enough to softly absorb extra colour and water, creating a smooth blend. To check if your paper will accept this technique, write on one side of your eraser 'Do You Like Me? Y/N' and throw it at your page and wait for a reply get down to table-height and make sure you can see a slight sheen across the whole shape/page, without any visibly raised areas like with flooding. The shape needs to be damp all the way through, preventing the additional paint and water from drying weird or hitting any unwanted edges.
Note: too much water on your brush will spread the paint and water too far, and may force excess paint to the edges and dry with a darker crust. Control your colour with a damp but not soaking brush (dab excess water / colour off your brush on paper towel before applying to the paper).
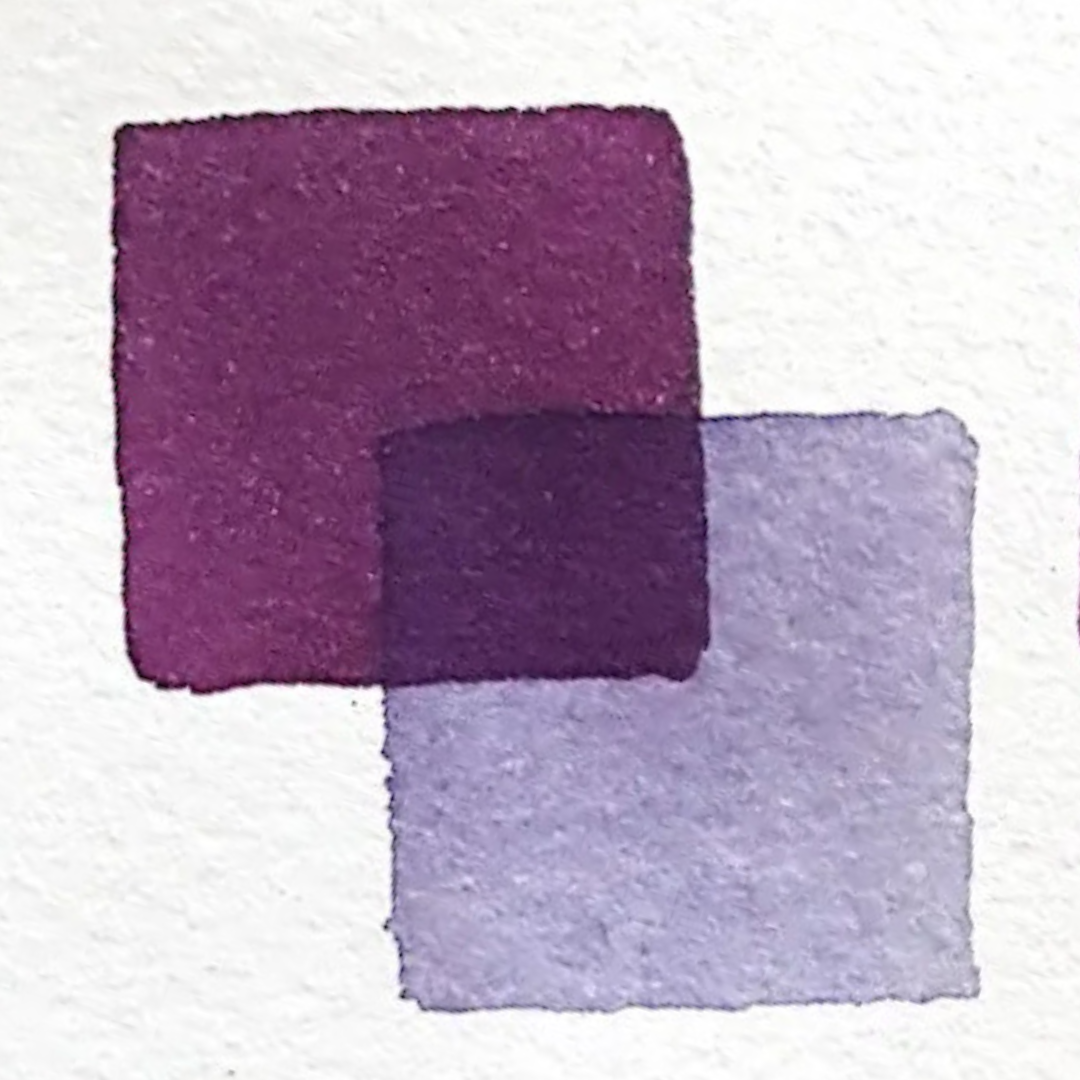
3. BLOOMS (PAPER IS PARTLY DRY)
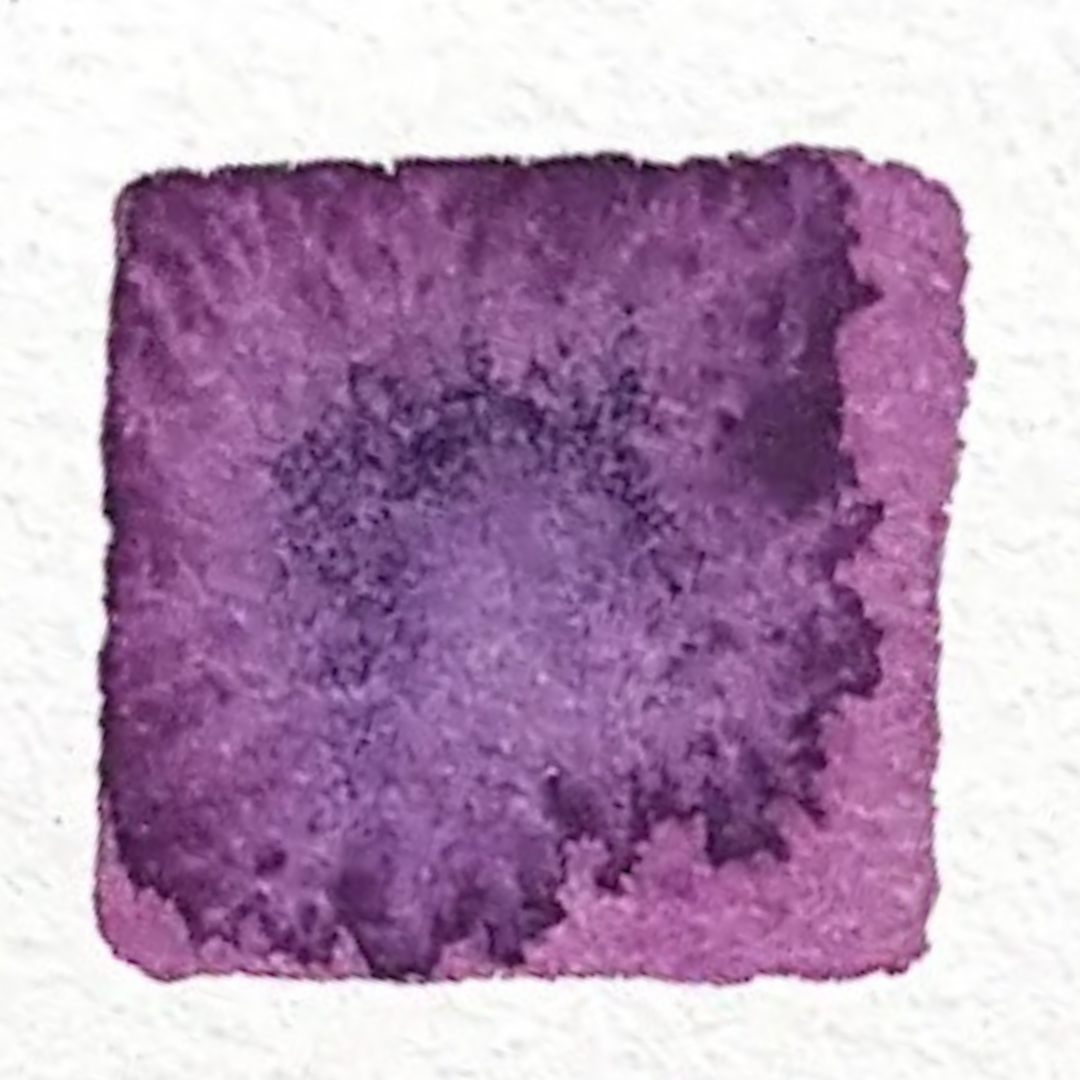
A bloom is what happens when you wait a little too long to drop in extra paint (or water) on the same semi-damp layer. Watercolour dries from the edges inward, and while the middle can still be damp, some edges may have already started to dry. This results in the paint and water butting into an edge and creating a jagged looking spot, instead of being able to spread evenly to the entire edge of the shape like with a soft blend. You can create this using the same technique as soft blends, but by waiting a little longer to add extra water or colour, so it partly dries.
Avoid this effect by dropping extra colour in sooner.
Note: blooms aren't always mistakes! This can be a fun way to create texture. You can also create soft blooms with just water, while the whole area is still damp.
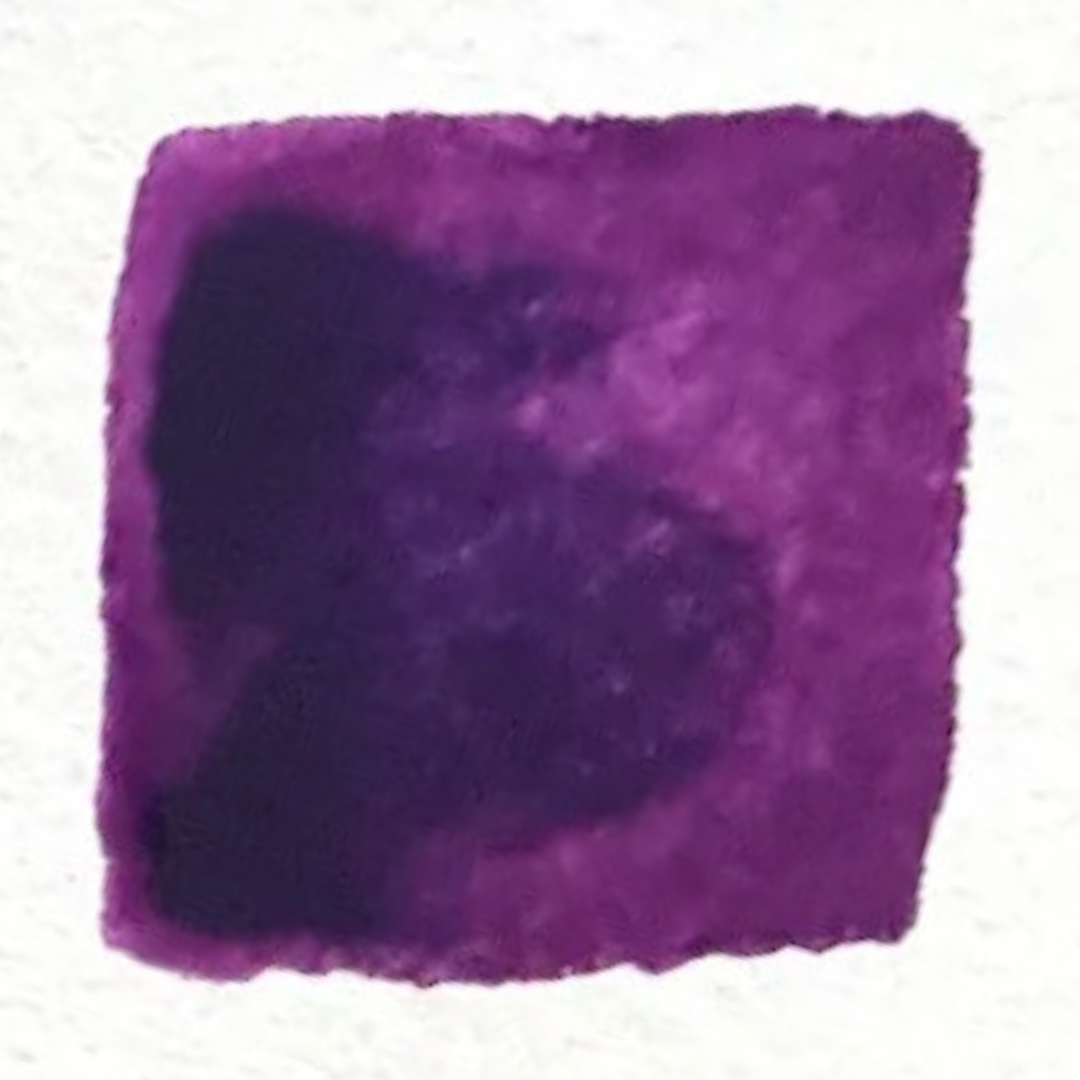
4. GLAZING (PAPER IS COMPLETELY DRY)
Glazing is when you allow a layer to completely dry before painting over it with another layer or colour. You can use it for fun transparent layers, to deepen the values of an area, or to colour mix. Put that medkit away, cos no bleeding occurs.
In order to still see the layers underneath, make sure you dilute your colour a little bit, otherwise it may cover the first layer up completely.
Note: if you overwork the layer underneath, you may reactivate it or accidentally lift off the colour. Be quick but gentle when glazing, no scrubbing!
IMPORTANT NOTES IN CASE YOU IGNORED MY PREVIOUS SIRENS:
- These techniques are not an exact science. Please don't get caught up measuring the exact amount of time you waited last time and using that as a benchmark in future!
- Variables such as the supplies you use (particularly paper), and even the climate you paint in will affect the timing of these techniques
- Focus on how the paper LOOKS. If you know you'll be glazing, make sure it's dry as a bone - use a heat gun if you need to. If you can see a visible blob of water on the paper - it's likely going to flood if you add more. If there's a slight sheen across the whole area, it should be perfect for soft blends. If the sheen has disappeared or isn't consistent across the whole area, you may get a bloom
- Learn ways in which you can correct and control these techniques, so they don't hold you back
Happy painting!
--Emma
